Screen recordings and camera clips often include black bars, desktop clutter, or a region you do not want to share. On Windows, Ray Video Converter lets you crop in the Advanced area of Output Settings before you convert.
Note: Cropping applies to regular video formats. SWF/Flash files belong in SWF to Video.
Steps
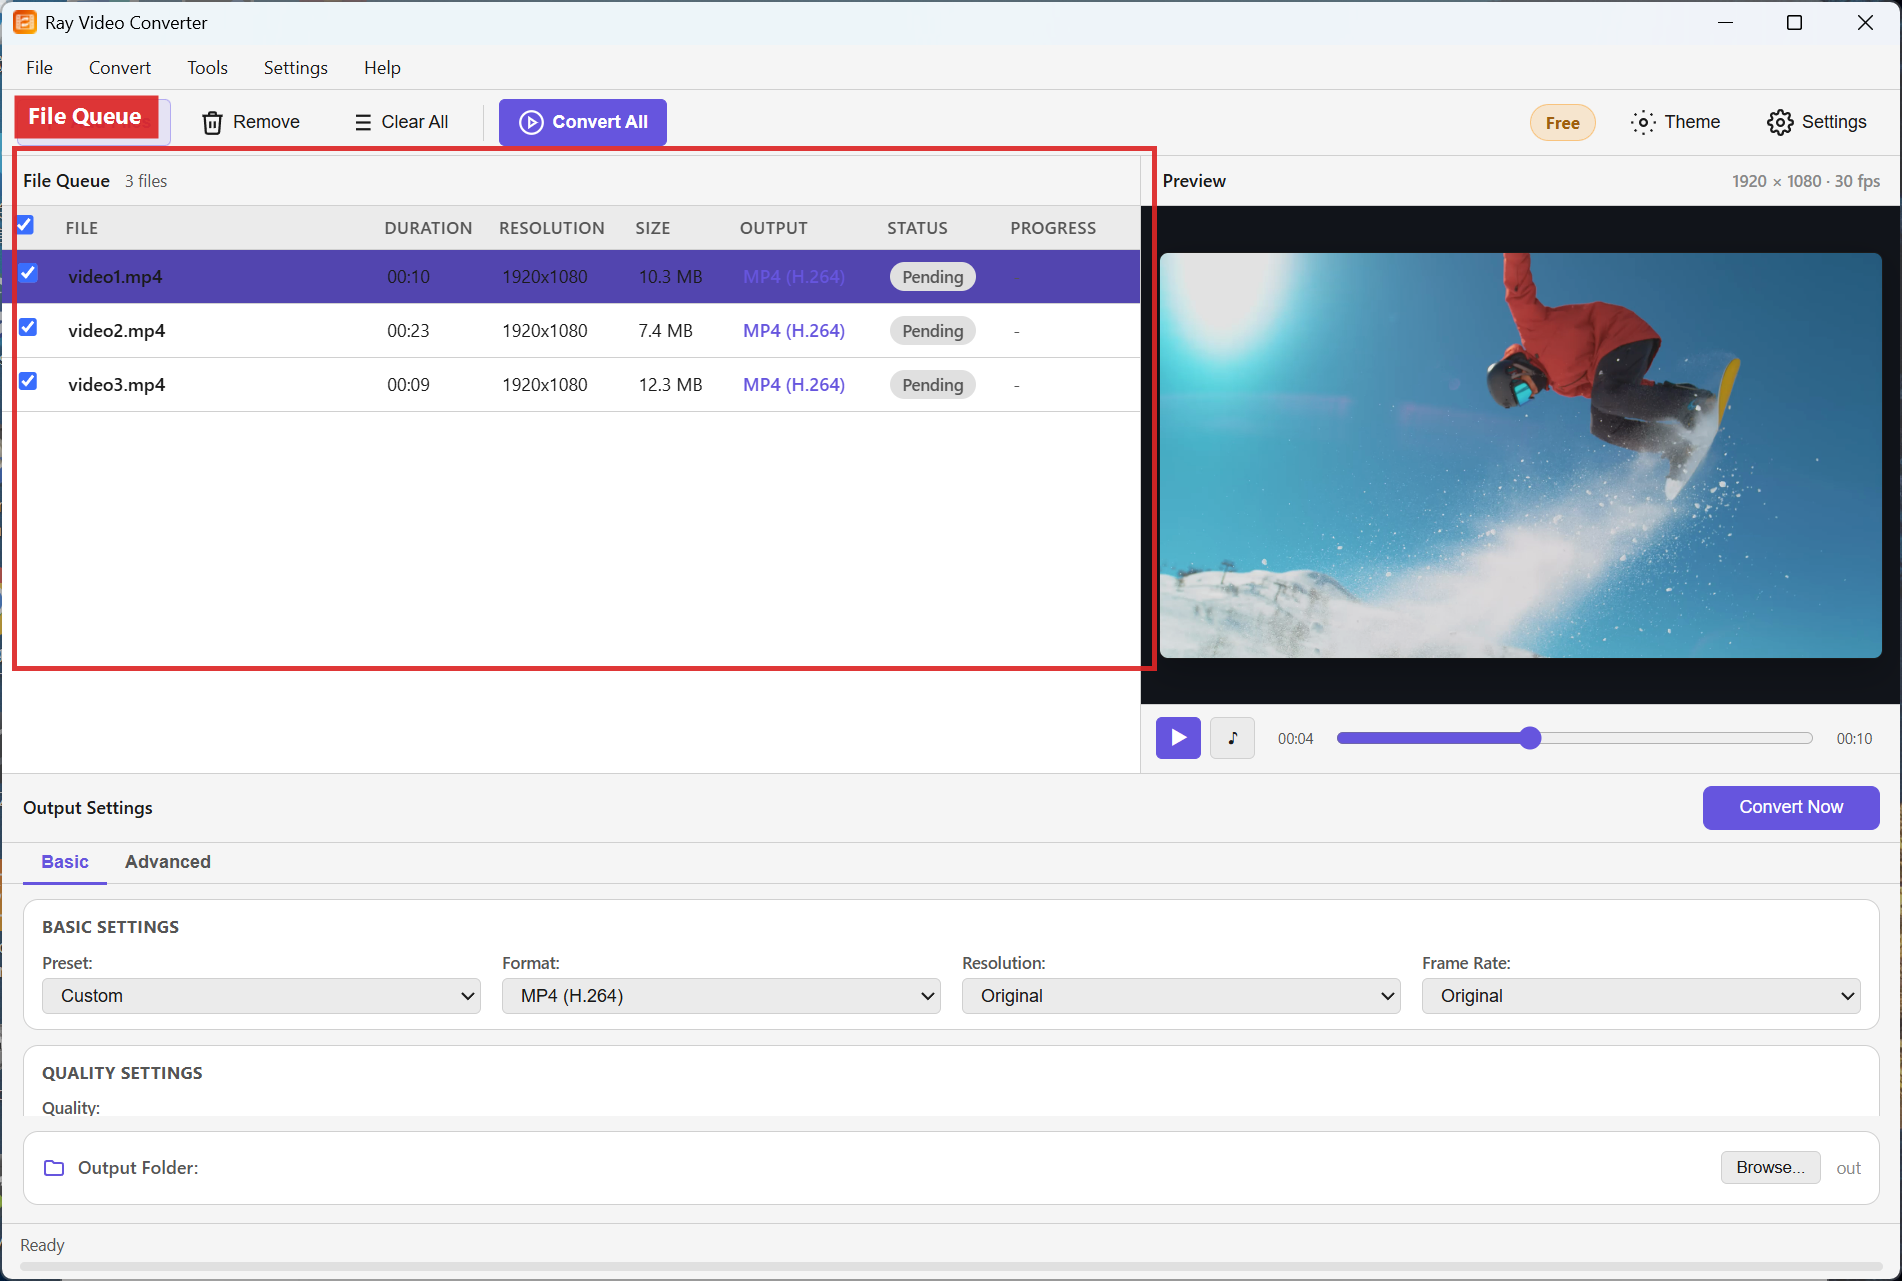
Step 1. Add the clip with + Add Files so it appears in the File Queue.
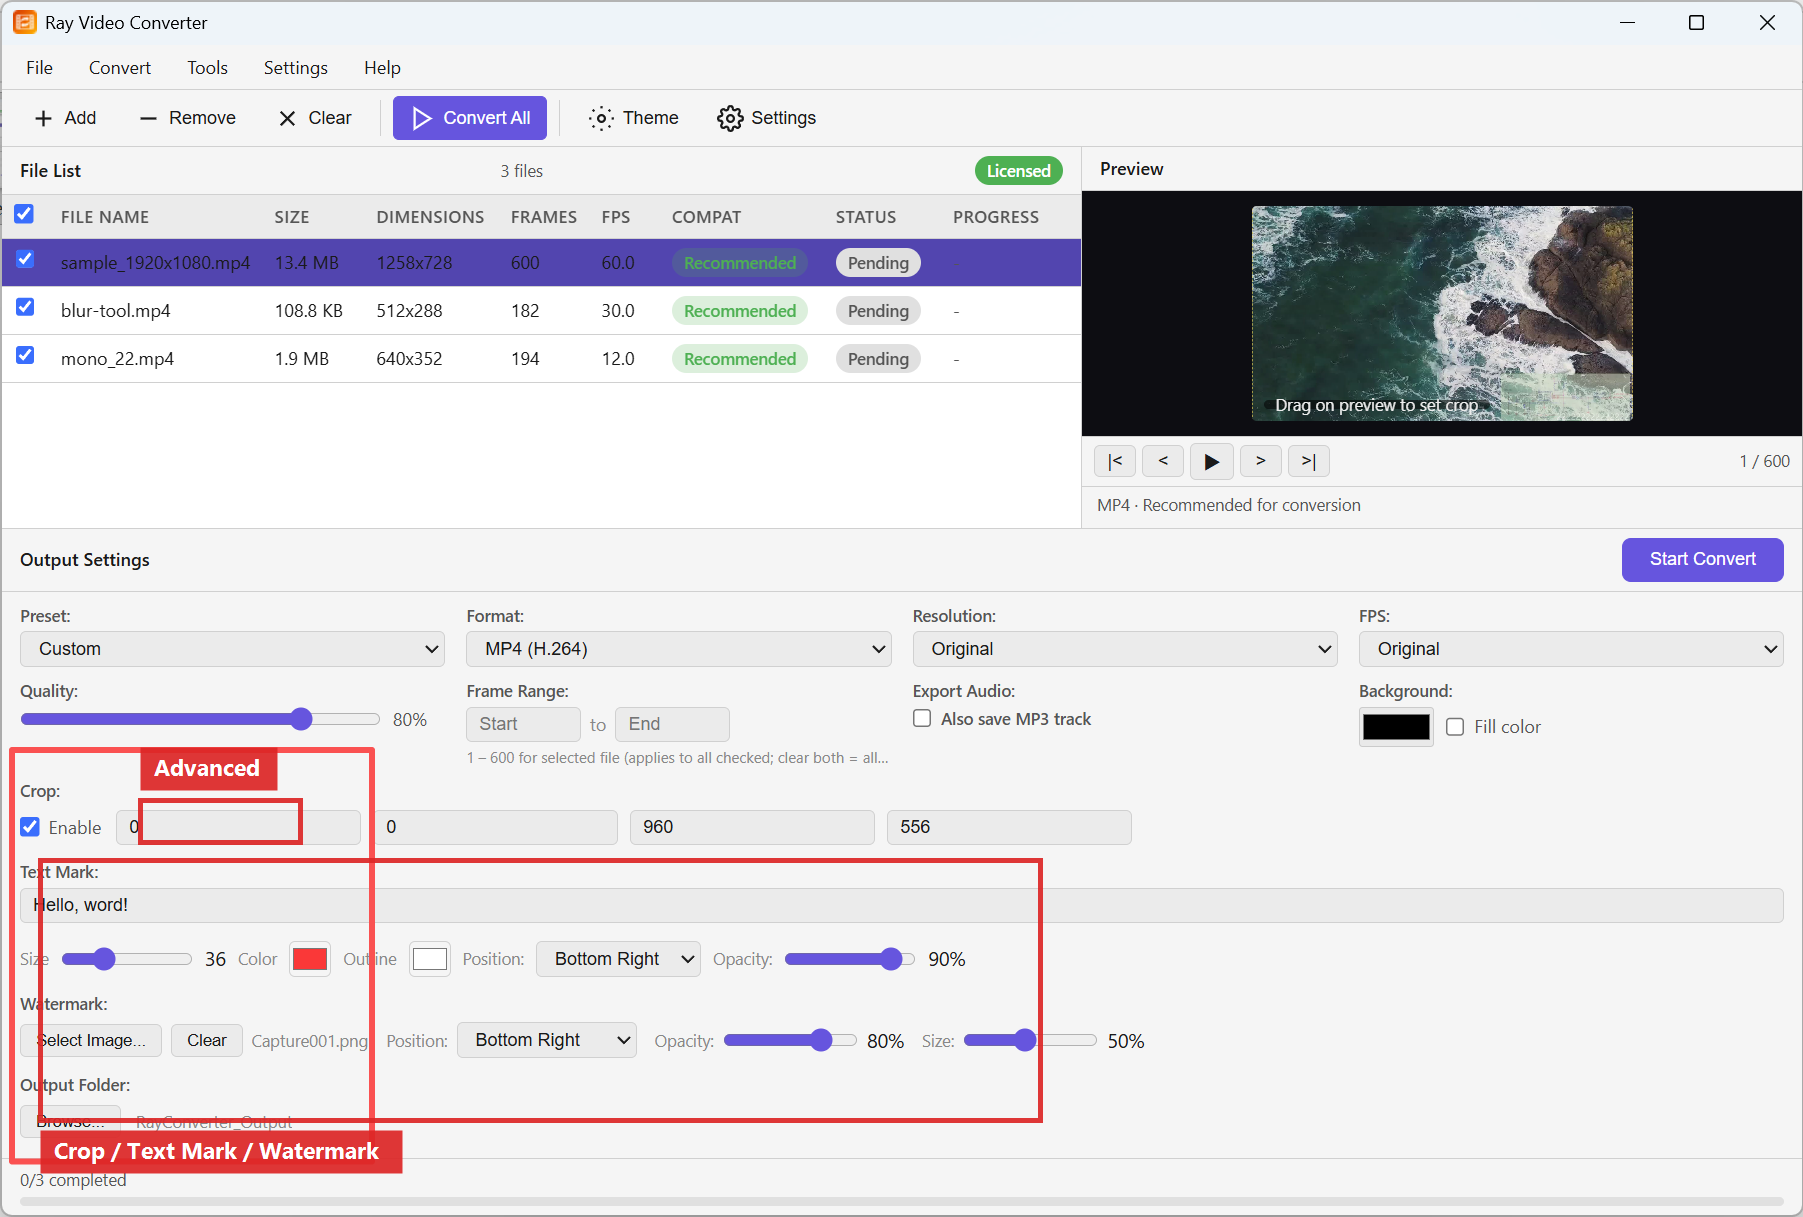
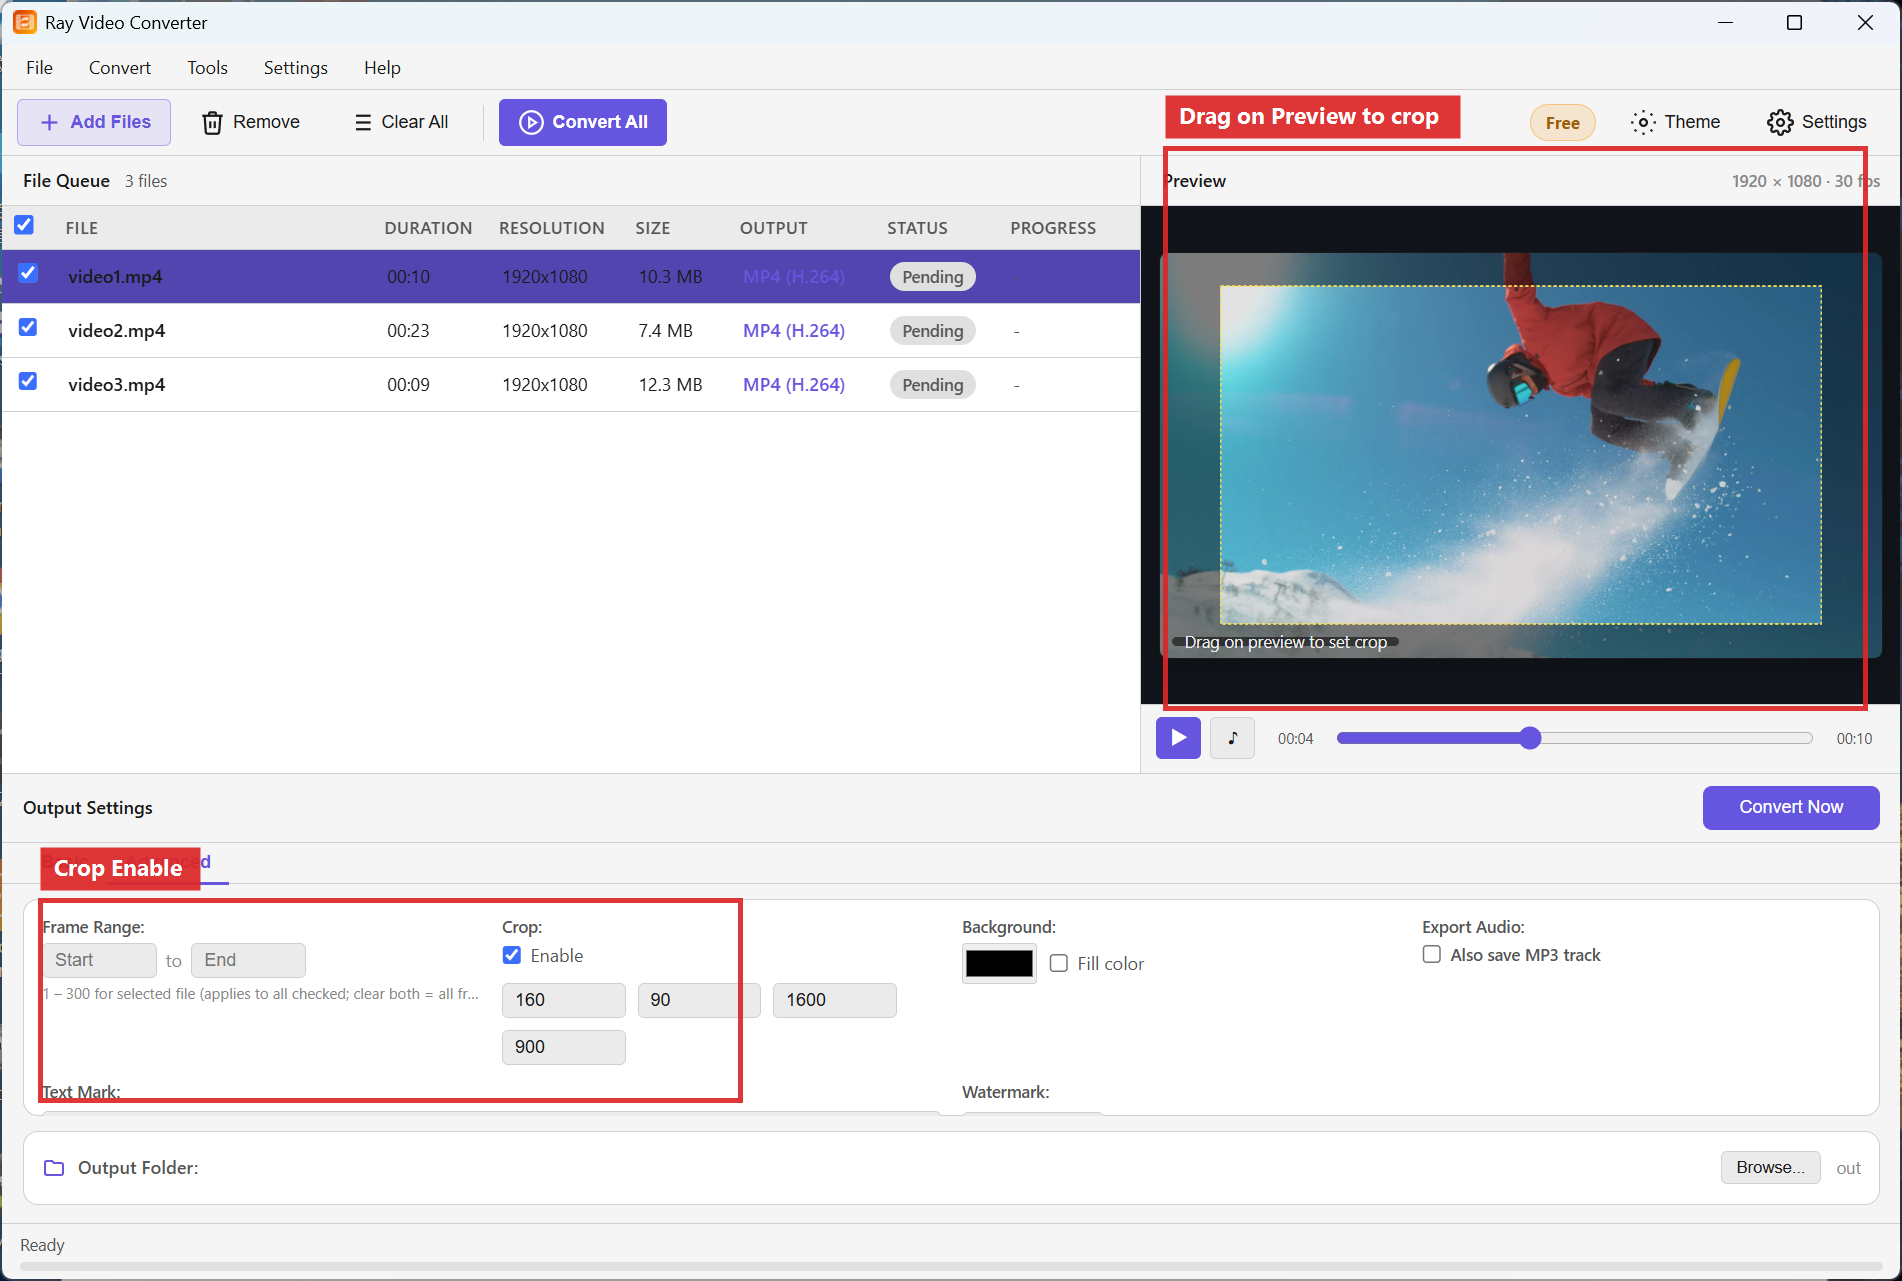
Step 2. Open Output Settings. Choose your target Format (often MP4 (H.264)). In Advanced, turn on Crop Enable. Adjust the crop with the preview drag handles or by setting X, Y, W, and H values. You can also set Text Mark or Watermark Select Image in the same panel when needed.
Step 3. Confirm the Output Folder, then click Convert All or Convert Now. The exported file uses the cropped frame.
Recommended settings
- Crop first, then pick Resolution — that way you do not upscale empty margins.
- Keep W and H even numbers when targeting H.264 players.
- Combine crop with 1280x720 when the goal is a focused, smaller share file.
FAQ
Does crop change the original file?
No. Cropping applies to the new export only.
Can I add a watermark while cropping?
Yes. Use Watermark Select Image or Text Mark in the same Advanced Output Settings panel.
Why does my crop look stretched?
Check that Resolution is Original or matches the cropped aspect. A forced widescreen size on a tall crop can distort the picture.
Try Ray Video Converter
Download the free Windows trial, then follow the steps above on your own files.
Free download Product page All tutorials